
Stabbed, Not Erased: Reviving a Verschenkenkiste Harddrive
Every neighborhood has a “Verschenkenkiste”, German for “someone else might still get use out of this, so why throw it away”. It’s a nice habit, honestly, usually stocked with the kind of stuff that’s too good to bin but too weird to sell: a fondue set from 2003, a single shoe, all rescued from the landfill on the small chance somebody nearby actually needs it. This time somebody put a bare 3.5" hard drive on top, no enclosure, no cable, and apparently the quiet confidence that nobody would ever get anything off it again.
Let’s test that assumption.
The Find
A naked Seagate Barracuda 7200.12, 250GB, just sitting on top of the pile. Somebody decided it was dead enough to give away, but not dead enough to actually destroy properly.
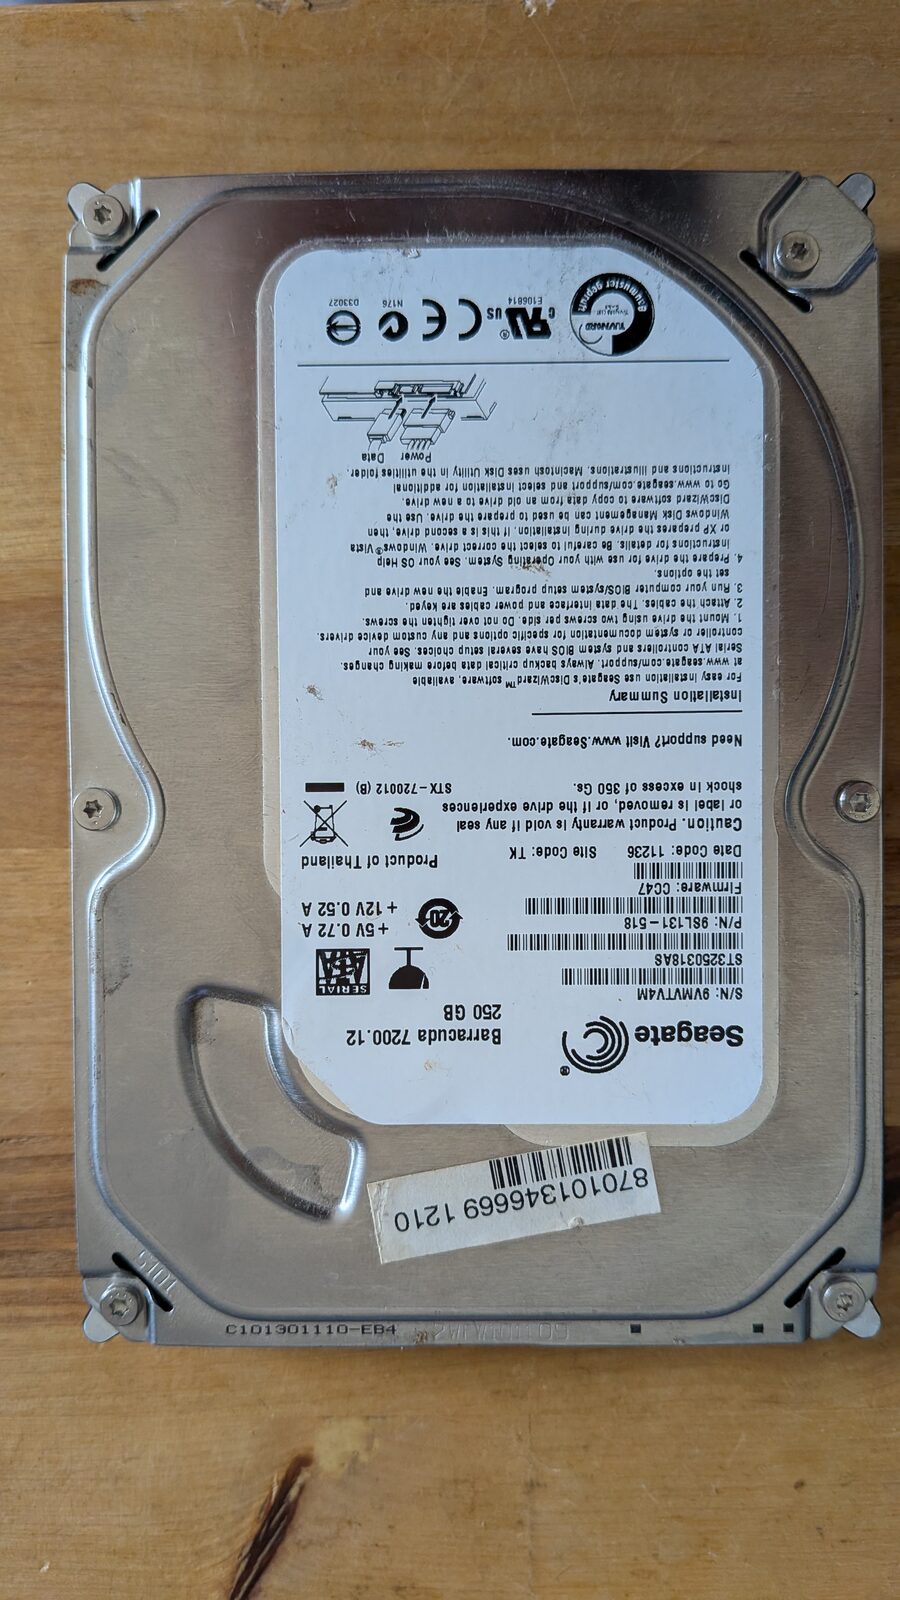
I took it home the way you take home a stray cat: without asking anyone if this was a good idea. If a bare drive gets thrown out, nine times out of ten it’s the PCB, not the platters. Cheap to kill, cheap to fix, if you know how.
Diagnosis: What Killed It
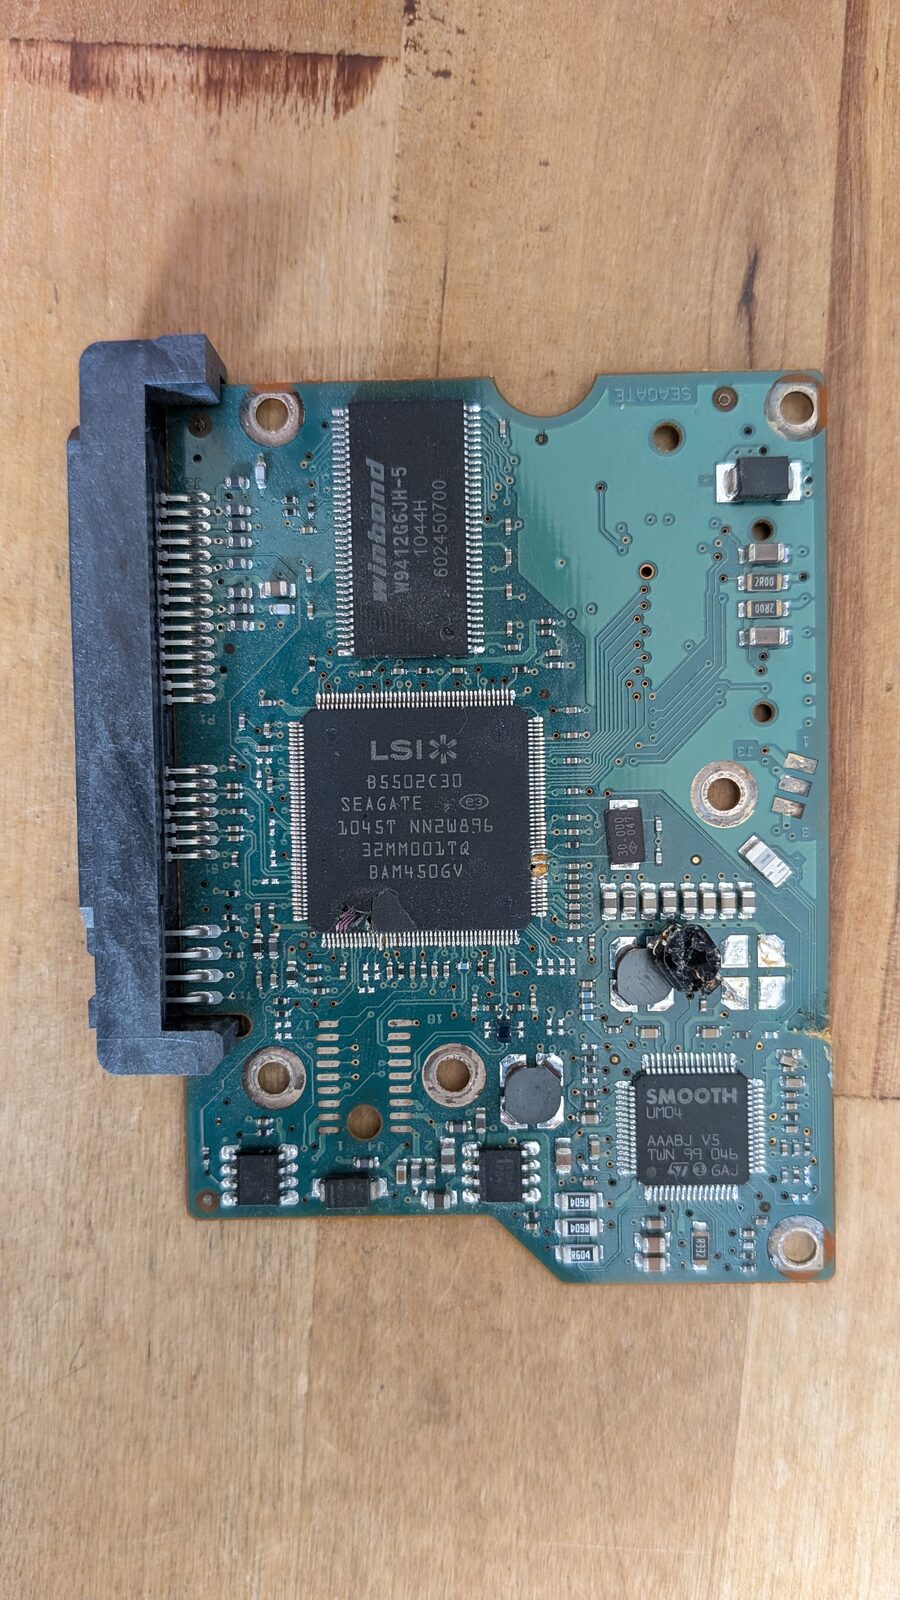
Six screws later, the PCB was off, and the diagnosis turned out to be less mysterious than expected.
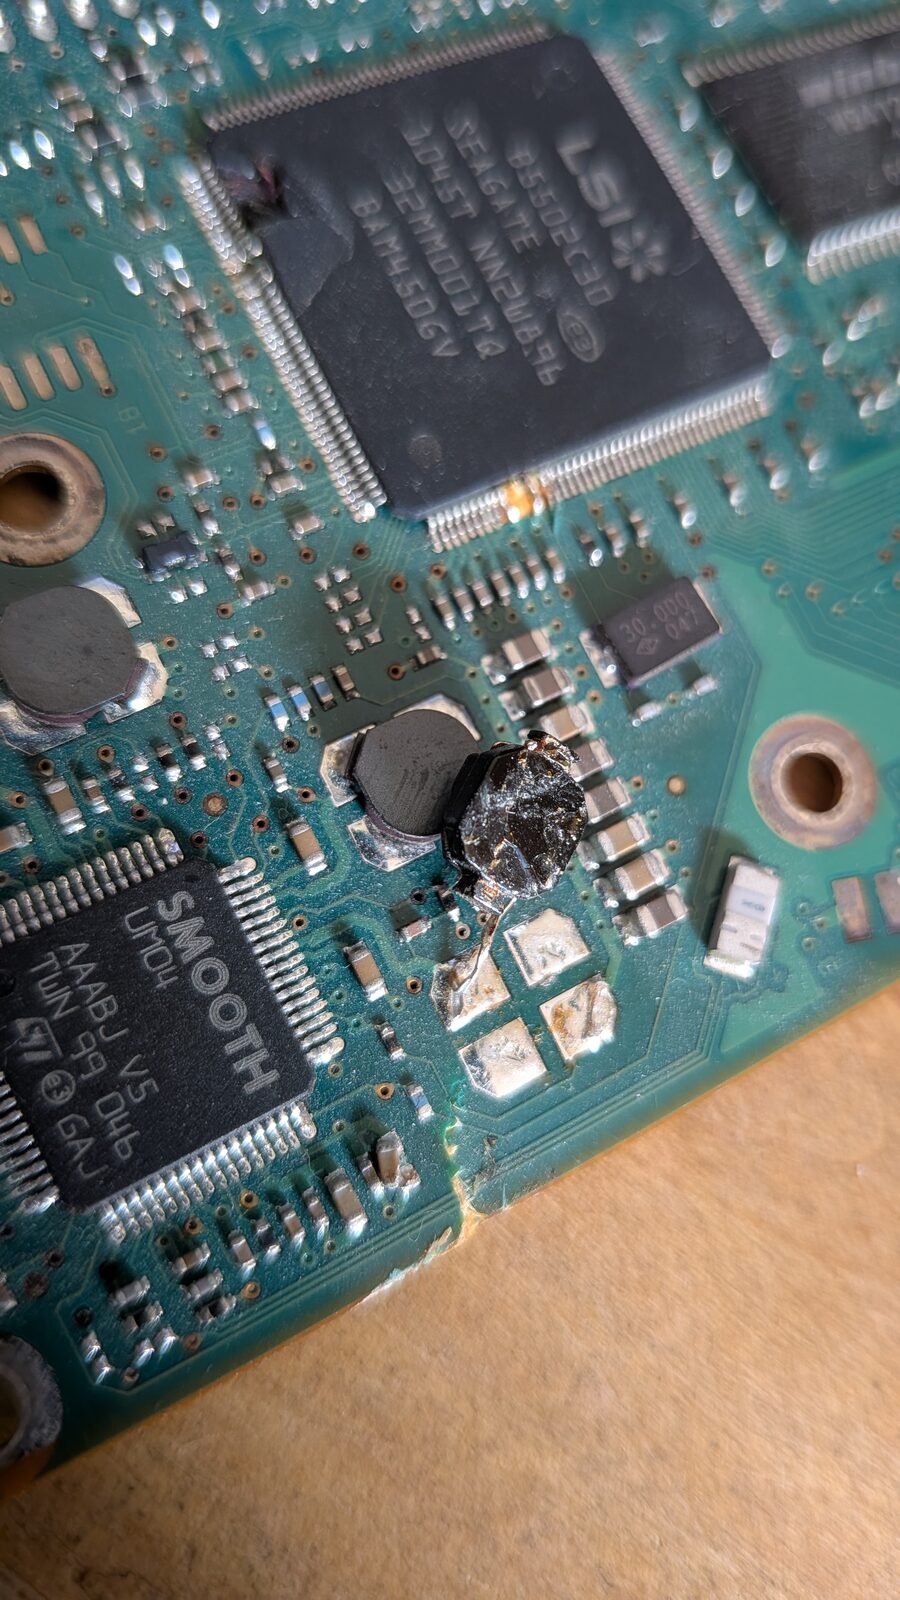
Right next to the motor driver sat what used to be a small component, now a crushed lump with a lead ripped clean off, and right beside it the controller’s corner pins were bent and torn. I’ve seen plenty of electrical failures before. This wasn’t one of them. This was blunt-force trauma.
Flipping the board over made it obvious. The backside was cracked clean through, with two gouges punched straight down to bare copper. This wasn’t a fault or corrosion, it was a screwdriver, applied with real commitment.
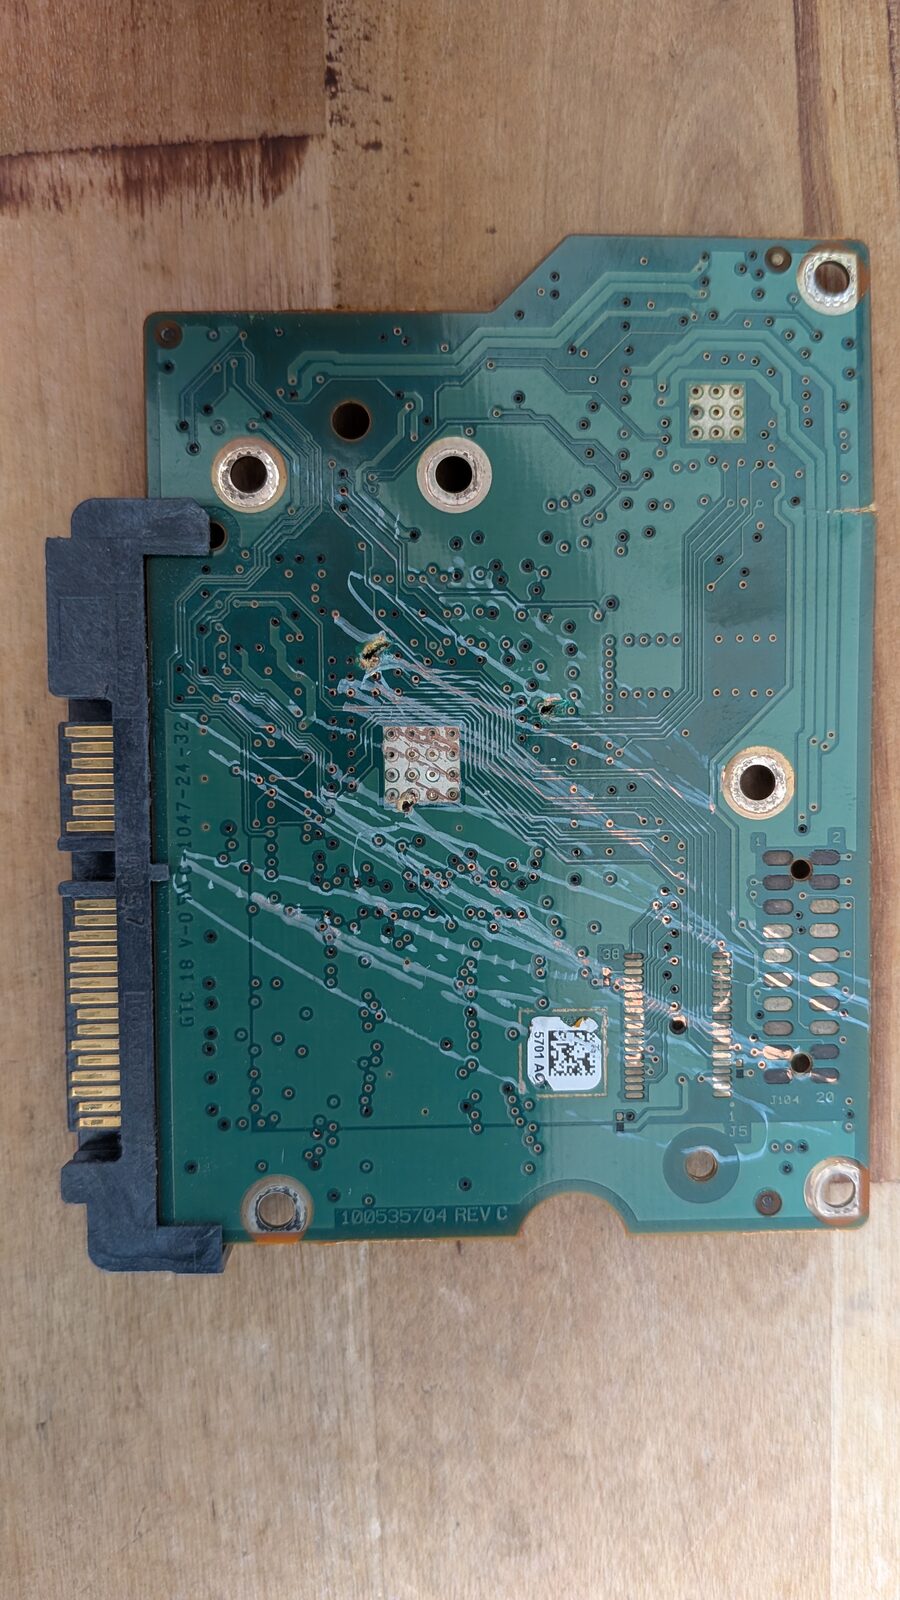
Somebody looked at a few euros’ worth of circuit board, decided it was the seat of all their secrets, and personally, physically wrecked it. The actual data was sitting a few millimeters away in a sealed compartment the screwdriver never got anywhere near.
Why You Can’t Just Bolt On a New Board
Luckily I had a spare PCB from the same drive family, saved from an earlier “I’m sure I’ll need this someday” moment that finally paid off. The tempting move here is to just bolt on the donor board and call it done. Most drives don’t quite allow that.
Somewhere on the PCB sits a small serial flash chip holding drive-specific data: adaptive parameters, calibration values, servo information that belongs to this head-and-platter assembly and nobody else’s. Slap on a donor board with its own chip still installed, and the new firmware has never met your platters and doesn’t much care to. Best case, it refuses to spin up correctly. Worst case, it “works” just enough to start overwriting your directory structure with real confidence.
So the fix isn’t a new board, it’s moving that one chip’s content across.
The Swap
I clipped onto the ROM chip on the dead board with a SOIC8 test clip hanging off a cheap USB programmer, dumped its contents to a file, and wrote that same dump onto the equivalent chip on the donor board. No desoldering or hot air needed, just a clip, a couple of button presses, and me hovering nearby, mildly nervous.
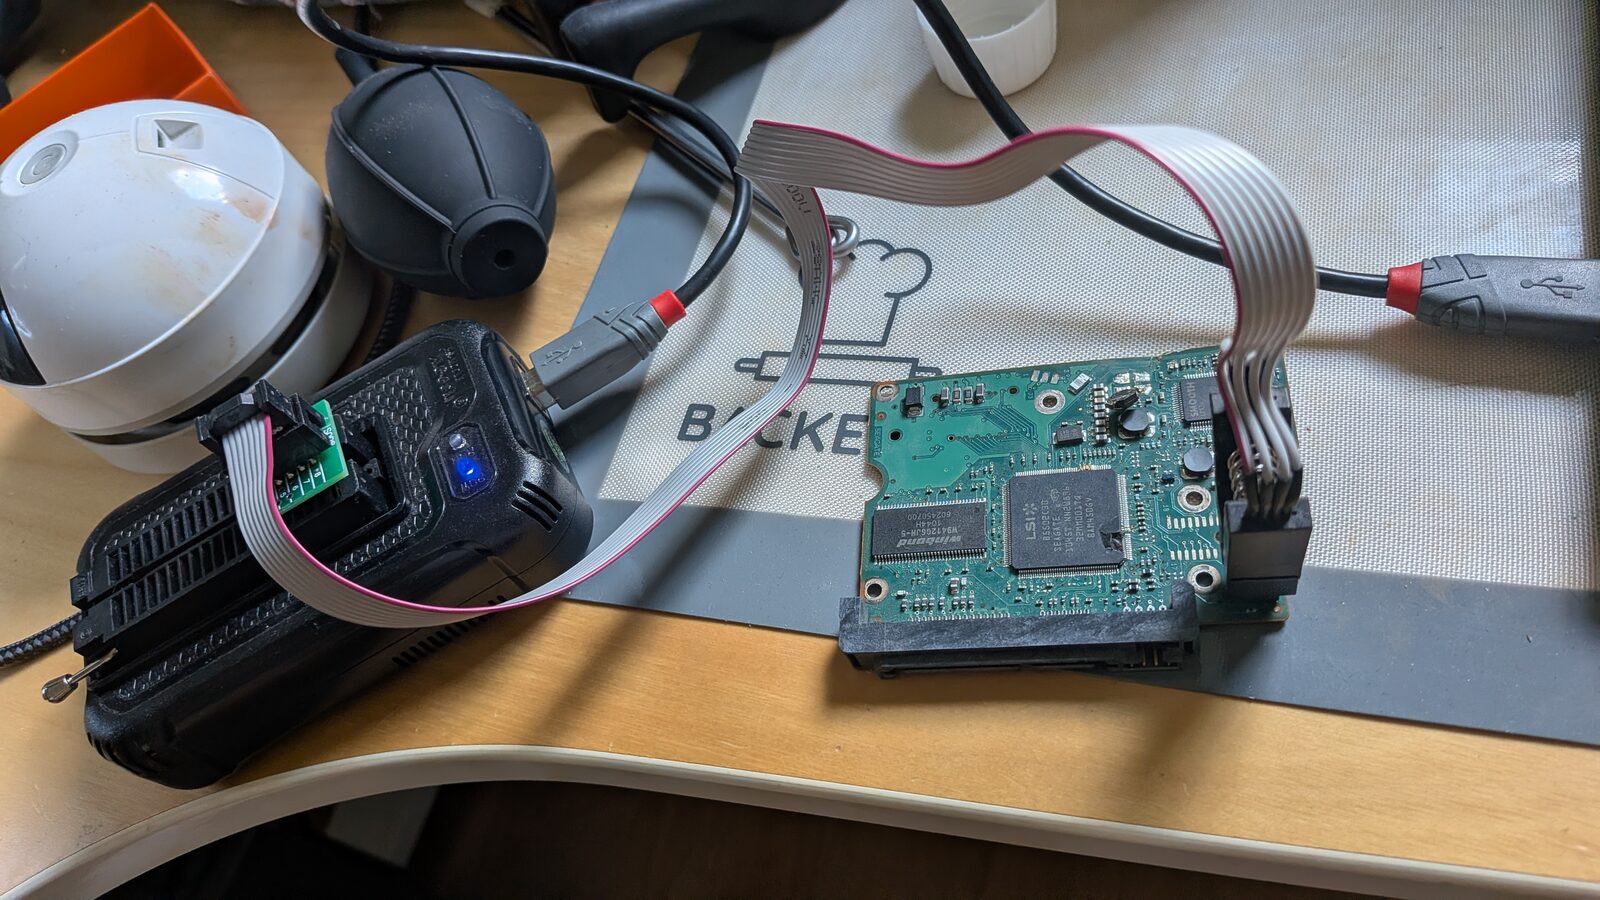
I’d mentally prepared for a rework station and steady hands I don’t reliably have. Instead it was closer to reflashing a cheap router than performing surgery on someone’s decade-old life.
Moment of Truth
Donor PCB in, screws back, SATA and power connected, and I flipped the switch expecting the usual funeral soundtrack of clicking followed by silence and the slow realization the evening was wasted.
Nothing like that happened. It just spun up, identified correctly, and sat there like nothing had ever gone wrong, a donor board that agreed to speak the platters’ language on the first try.
Cloning and Verifying
“It spins up” and “the data is intact” are two very different claims. Time to prove the second one.
I pulled a full image with OpenSuperClone, my usual tool for this, and it didn’t need to work around bad sectors or babysit slow reads.
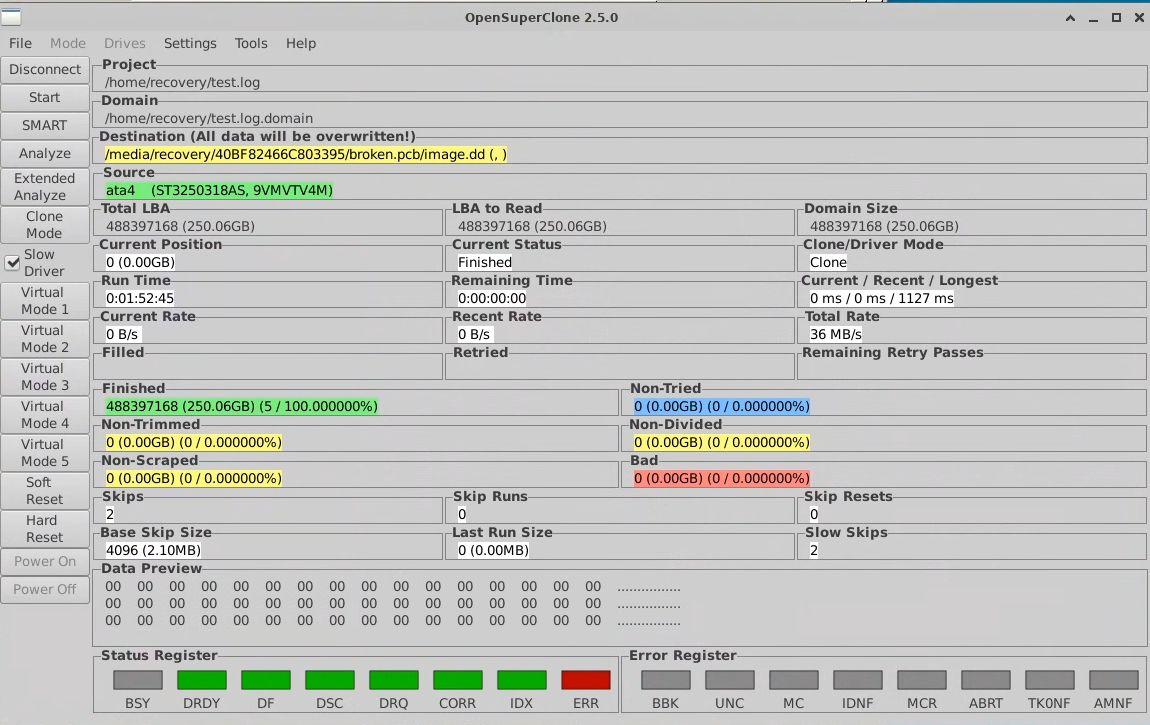
100% imaged, zero bad sectors, a calm, boring 36 MB/s the whole way through. The heads and platters never noticed anything had happened one layer above them. Somebody put in real, physical effort to destroy this drive and managed to kill the one part that costs a few euros to replace.
Whose Data Is This Anyway?
I loaded the image into R-Studio to sanity-check the filesystem, mostly for verification, and got handed a lot more than a partition table.
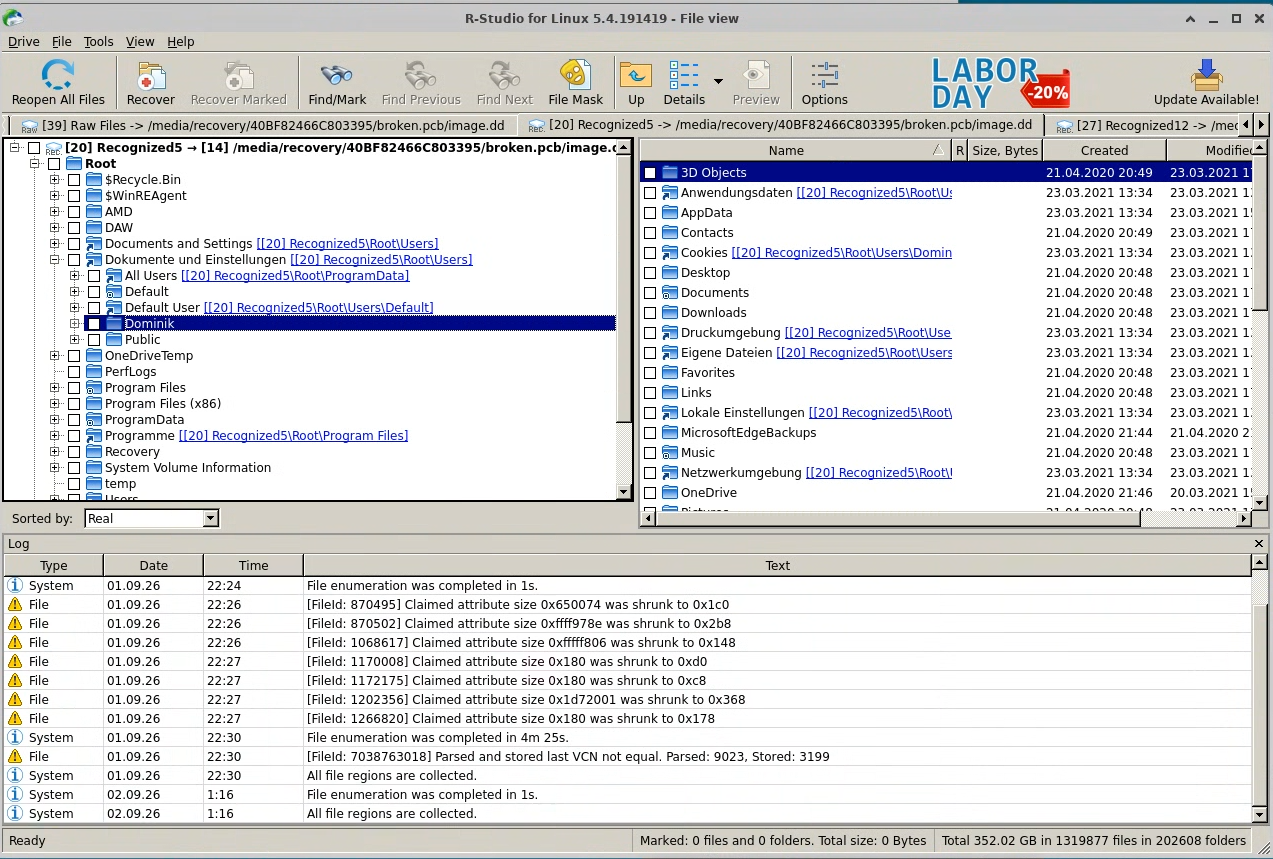
A full Windows install with a real user profile, folders that were never mine to browse and that I had no intention of browsing beyond confirming they exist. Somebody clearly believed that stabbing a PCB was the digital equivalent of burning a diary, closed the box, and moved on. It wasn’t, and they shouldn’t have. I closed that file tree the moment I’d made my point. Proving a recovery works doesn’t require going through a stranger’s Documents folder.
If this is your drive: a 250GB Seagate Barracuda 7200.12, serial 9WMTV4M, with a “Dominik” user profile on it, that’s a genuinely small world. Get in touch.
Reflections
- A dead PCB doesn’t mean a dead drive. It’s the cheapest failure mode to fix, and easy to mistake for a lost cause.
- Stabbing a circuit board with a screwdriver doesn’t destroy your data. It destroys a cheap component and leaves the platters, the part that actually matters, completely untouched.
- Full PCB swaps on drives with per-unit adaptive data don’t work by themselves. Move the ROM chip’s content, not just the board.
- A SOIC8 clip and a cheap USB programmer replace a lot of soldering-iron courage.
- If you genuinely want a drive gone: degauss it, shred it, or drill straight through the platters. Anything less just leaves it a Verschenkenkiste away from somebody like me.
- MAKE BACKUPS
- CHECK YOUR BACKUPS!
- MAKE BACKUPS OF YOUR BACKUPS!
so long
References
Give credit where credit is due. There were a lot more forum threads and half-remembered guides, but these are the important ones.
- Explanation of PCB / ROM swaps on Seagate drives: https://www.hddoracle.com
- OpenSuperClone, the successor to HDDSuperClone: https://github.com/ISpillMyDrink/OpenSuperClone
- R-Studio Data Recovery: https://www.r-studio.com/
- Spare PCBs and matching guides: https://hddpcb.eu/