
I hate you, WD
Storyline
It all started with a simple question from my beloved girlfriend: “A friend of mine has problems connecting her external harddrive to her PC. She said she transported the USB drive with the cable attached and now the USB Port looks weired. Can you fix it?”. Okok…No Problem. “No Backup, no pity” doesn’t mean “No Backup, no help” and that should be a fast fix. Popping the Harddrive out of the enclosure, connecting to an external SATA to USB connector, and bob’s your uncle.
That’s what i said a week ago.
Discovering a broken USB Port.
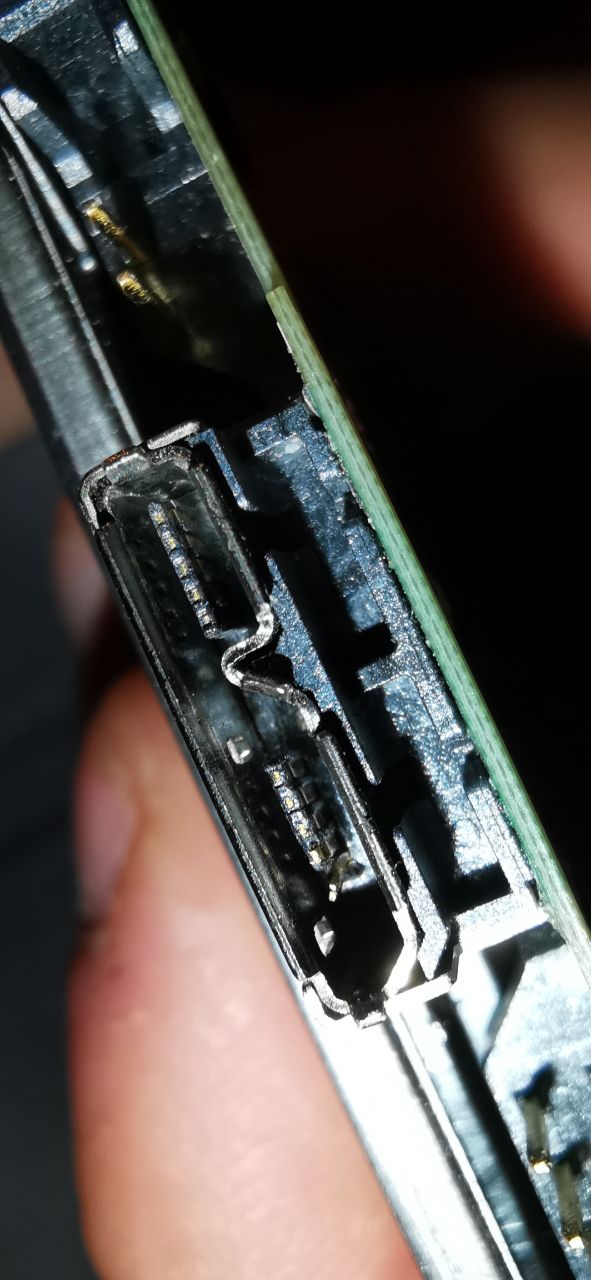
The USB port was broken. There is no way around this. The vbus pin was completely bend. Too bad it was the vbus, the other side would have been fine. The USB2.0 connection would still have worked, but yeah…always the worst possible way. It was possible to bend it back and connect the drive to a computer, but it would always reset and was unbearably slow. Copying data of this drive was not possible. Opening a directory took about 2-3min, sometimes it failed and the drive had to be power cycled.
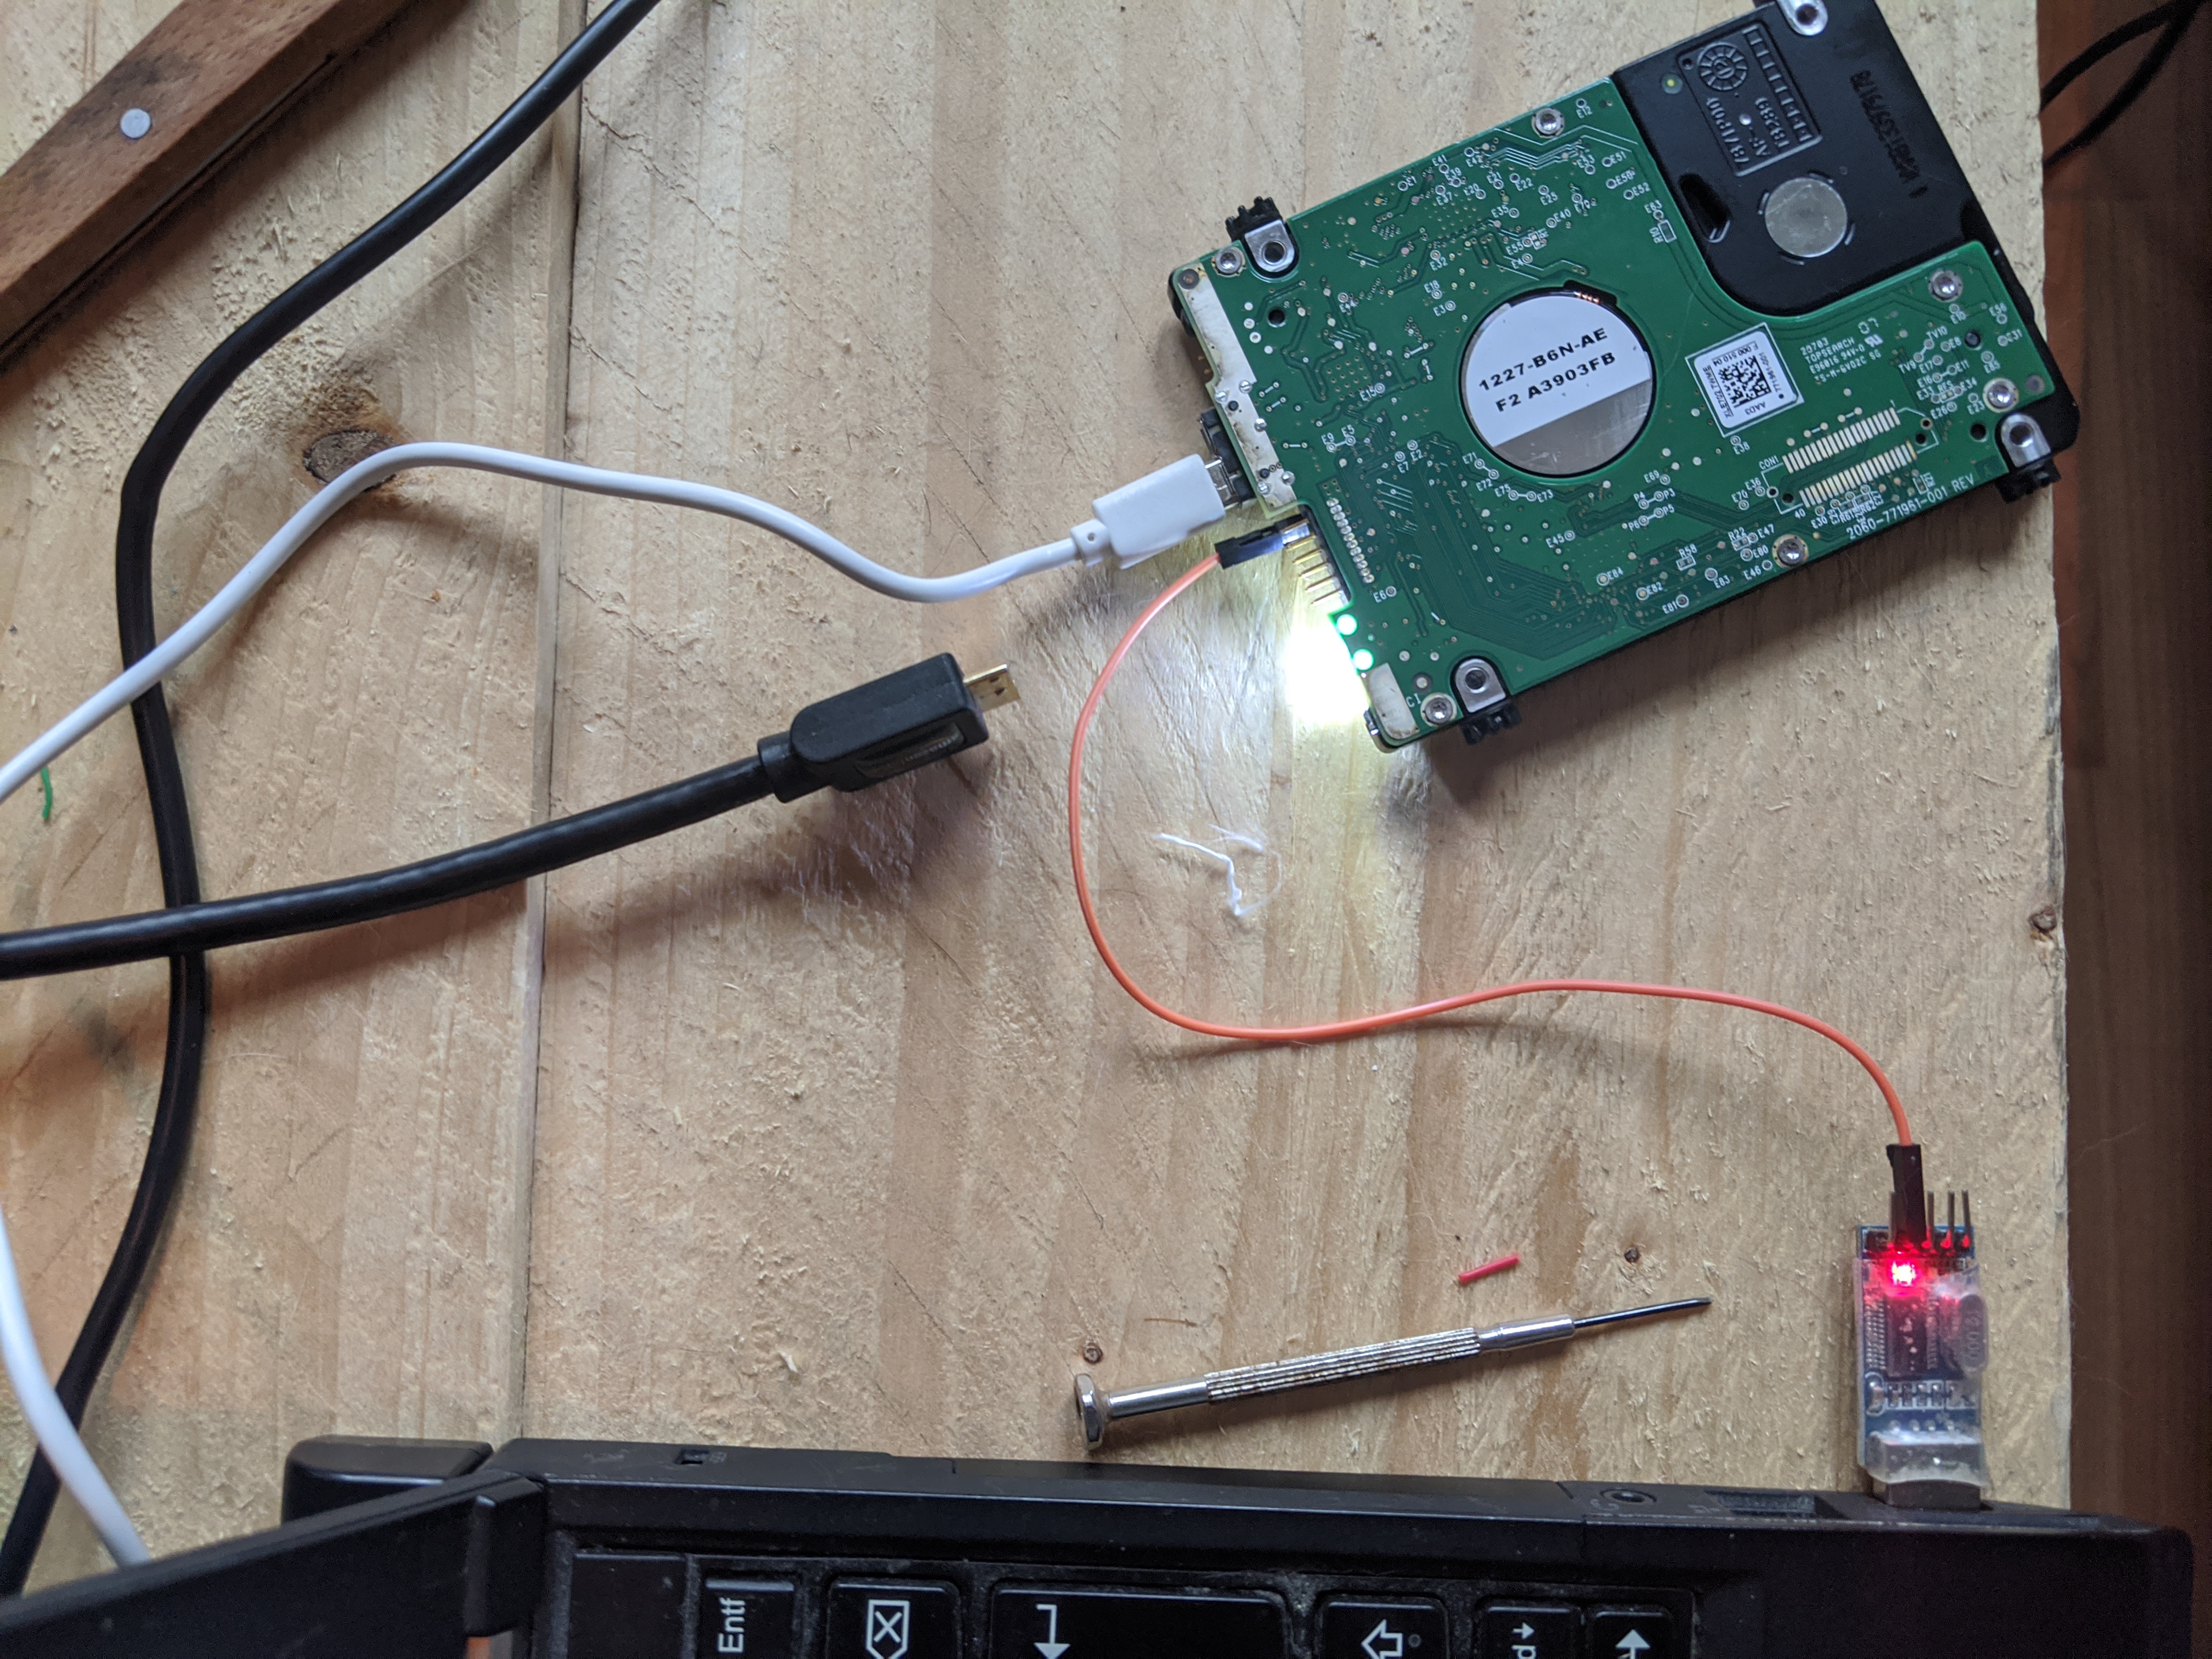
I was pretty sure the USB resets were happening because of the bad power connection and maybe some interference on the data pins, so i broke of the vbus pin entirely and tried to circumvent the connection by using the jumper wires and an external power supply. I used a USB2.0 Micro cable to force the connection on USB2.0 only, which could take care of some of the timing issues on the data lines. Yeah…the setup looks dodgy. This was working more stable though, but not stable enough to copy 1TB of data over a couple of hours.
Seeing and reading the data though: “It is all there, we just have to find a way to circumvent the USB port.”
Another solutions had to be found.
Swapping PCBs
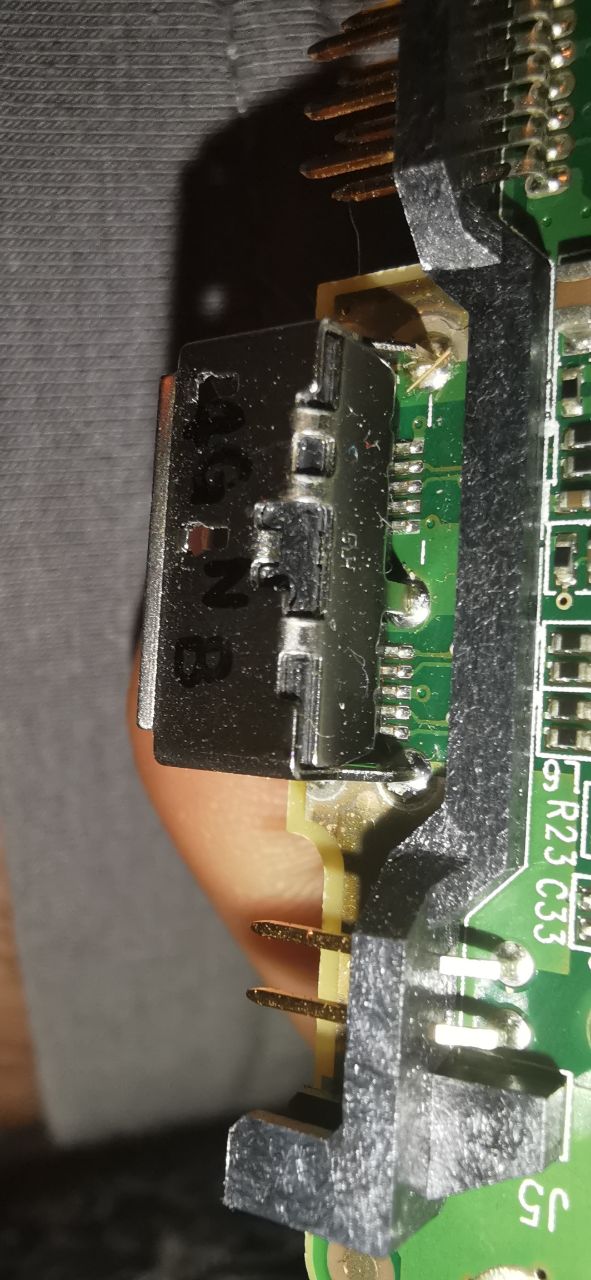
Luckily my WD Elements drive had the same PCB number as the broken one. After reading up on it, i had to swap 2 Bios Chips to make it compatible. Swapping the chips was much easier than soldering a new USB3 micro b port. Thought about it…and it looked terrible…Even the electronics store around the corner refused to solder this.
The only problem: I didn’t want to solder SMD with the really bad soldering iron i had at home. I wanted to use a hotair station which is the easiest option to desolder this stuff. I thought a had to wait 2 weeks to get to my parents to get to the b4ckspace (Hackerspace Bamberg). Buuuut, after asking around it was possible the visit the c3d2 (Hackerspace Dresden), which had the necessary equipment for me to use.
And i tell you: It was a breeze. Thank you for the kind welcoming in your realms.
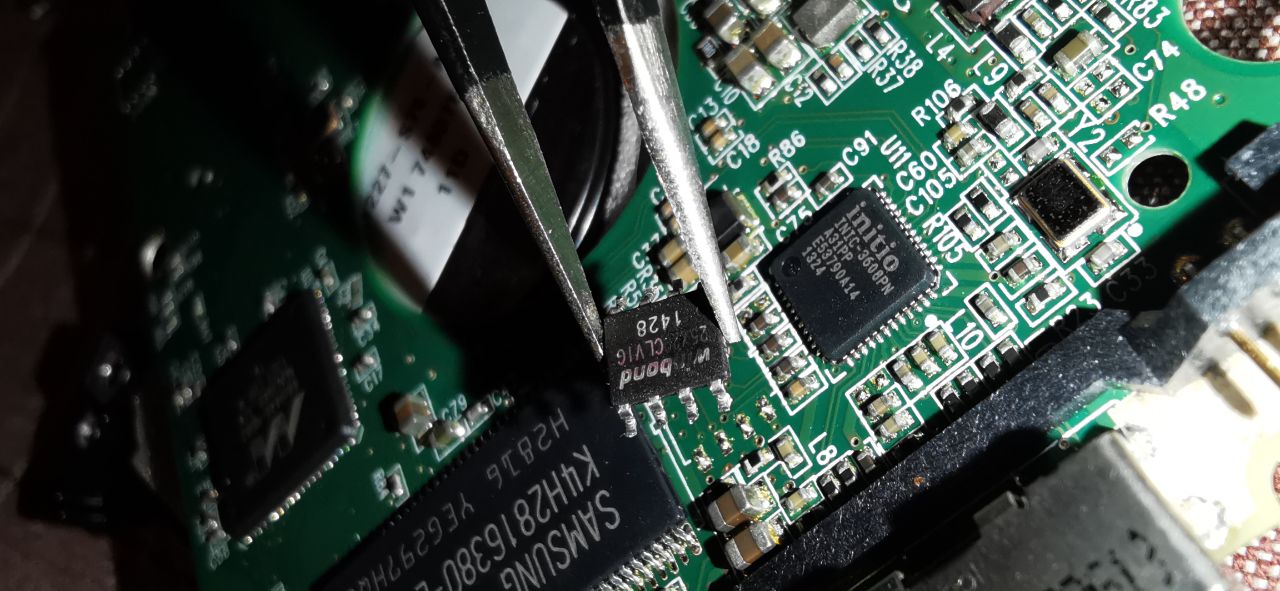
After desoldering and soldering back the correct bios chips, i had a stable connection to the Harddrive, but still terribly slow transfer speeds. We are talking about 100kb/s max. It was below for most of the time. No way to transfer 1TB across. At least we are able to access all the data without a hitch, with a stable drive. \o/
Fixing Slow Speeds
Some newer WD drives might sometimes suffer from the “Slow Issue”, or in other words, they will respond very slowly, even if the heads and surface aren’t significantly damaged. This is due to a problem, when the drive gets “stuck” trying to re-locate sectors, or more specific, adding and managing the list of sectors that are “candidates” to be relocated. The WD drives basicaly save specific sectors proactively to be re-located. This makes the drive rather slow.
A fix is to empty this relo-list and disable the re-location feature.
It can be done by hand, as Spildit from hddoracle.com, has shown. But it is much easier to use a tool from Maximus called HDDSupertool
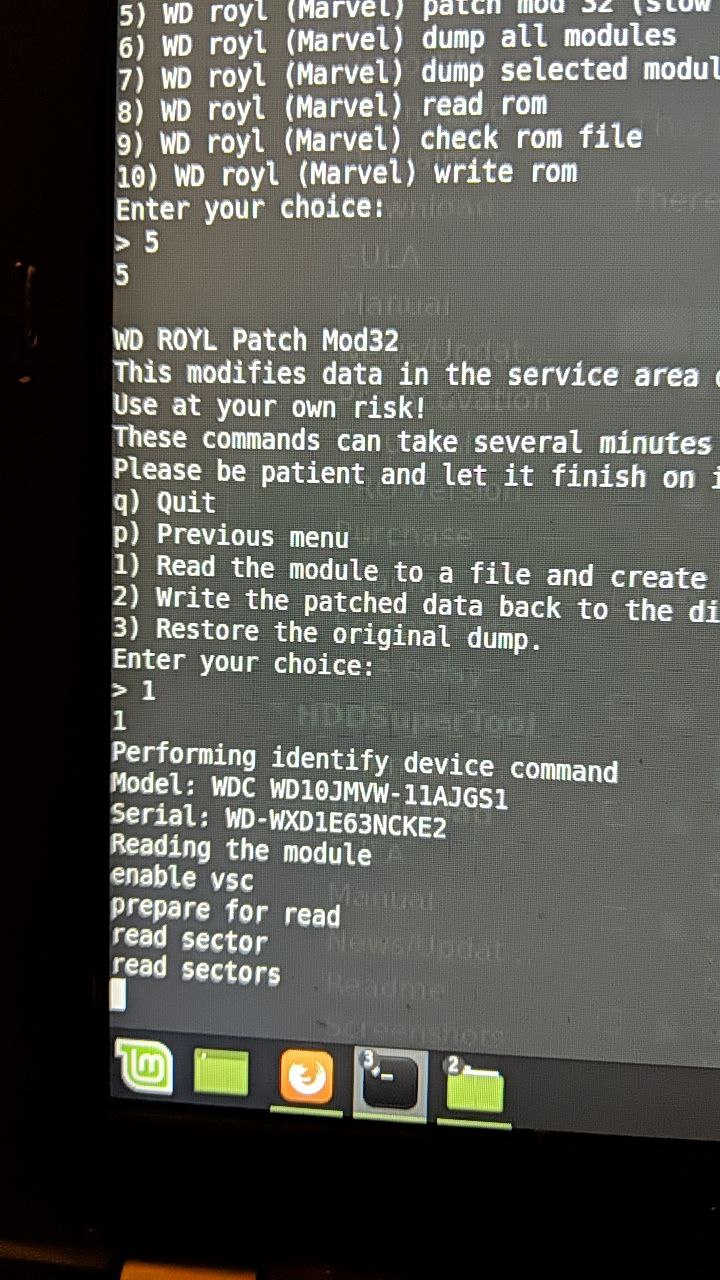
This tool basically reads the specific modules from the system drive (which is also located on the platters), patches the relevant sectors and writes them back.
Let the clone wars begin
No wait. Because i just deleted all the information about the “going to be re-located”-sectors and i didn’t know what state the drive was, i wanted to save all the important stuff by hand first, accessing only the relevant parts on the drive, Rocket and HDDSuperClone helped me a lot on this one.
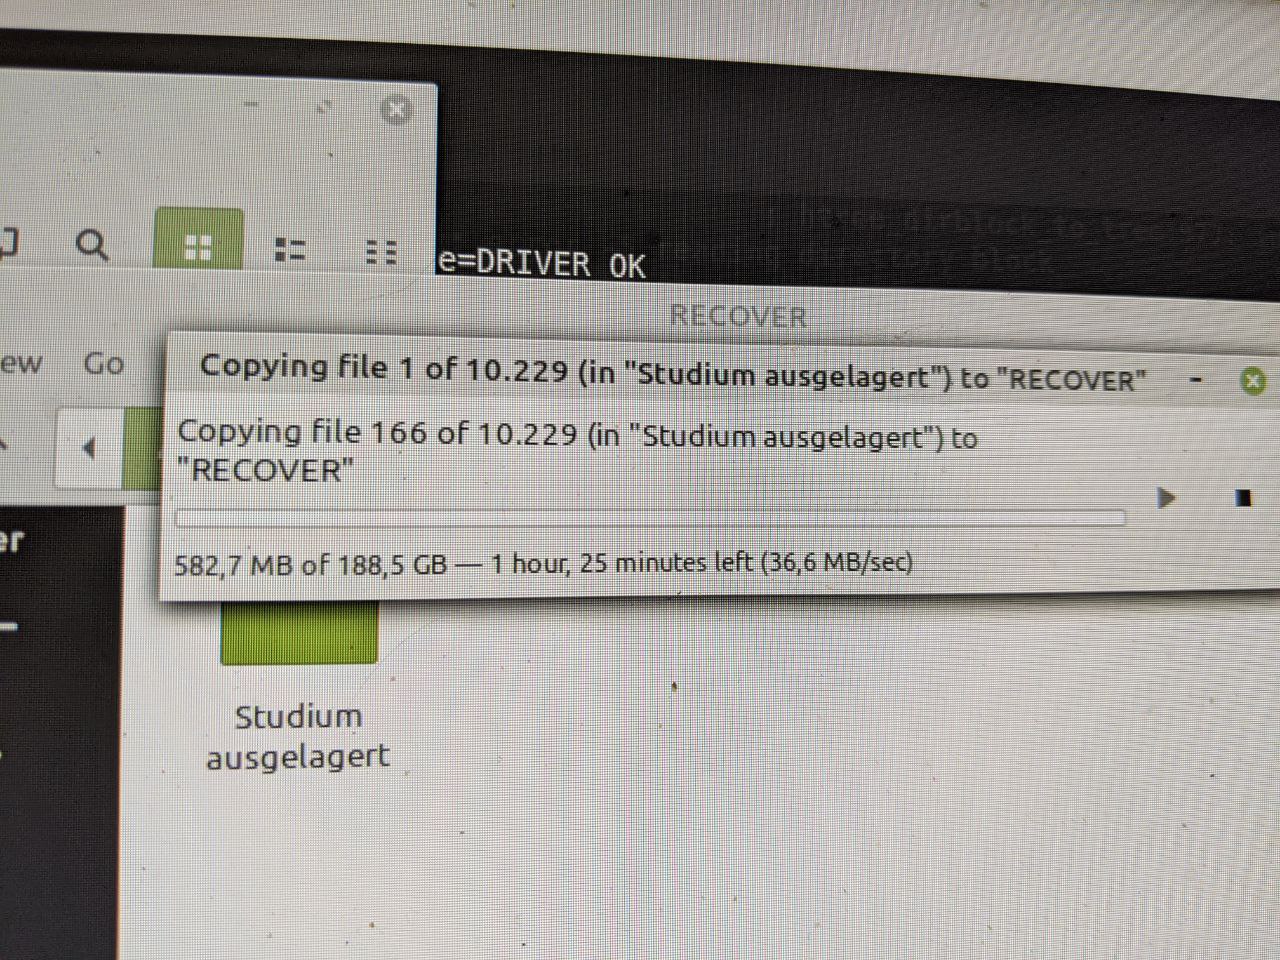
Now we can clone the broken HDD to a new HDD, i had laying around. It was still a tedious process, but with the trusty tool HDDSuperClone and a little bit of time from my trusty little thinkpad, we had a pretty close copy of the data. Around 4KB were bad sectors, but because they were aligned pretty evenly, i think it was damaged before by a head scratch and all the data was re-located beforehand. Nonetheless i let it run through the whole process.
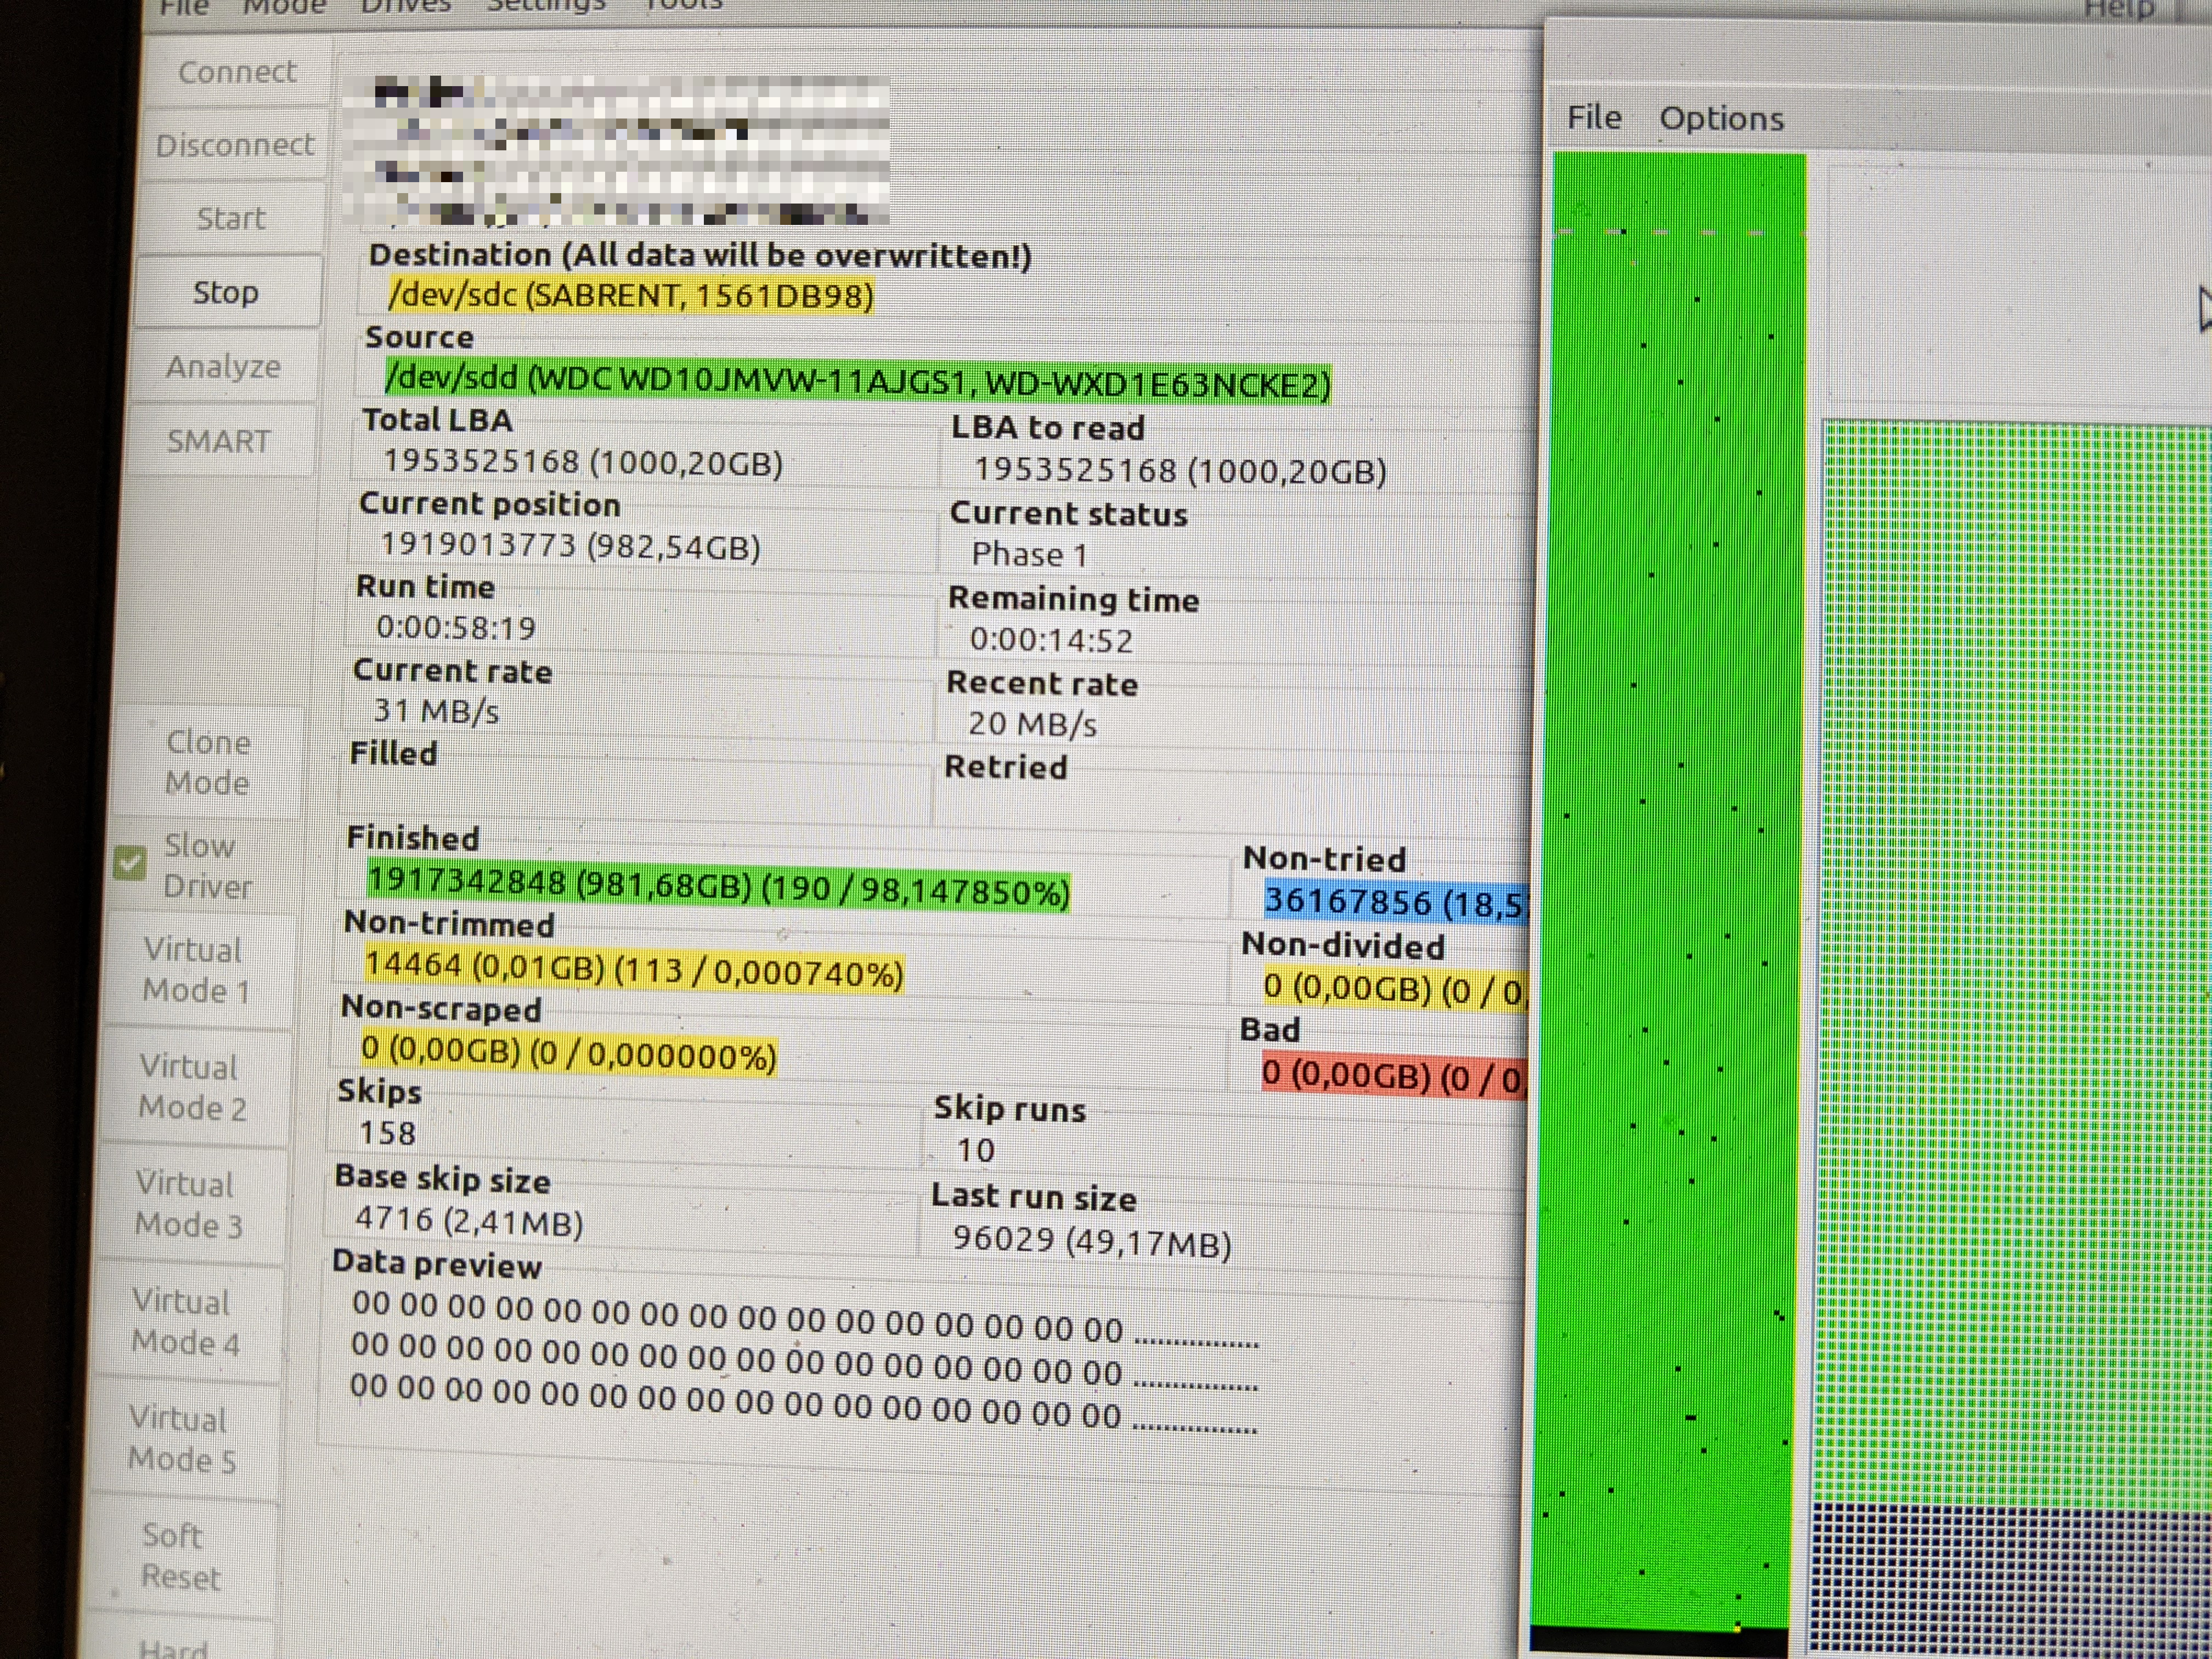
24h hours later, tada, a new drive. I think it could have been faster with a paid version of HDDSuperClone and a bit of tweaking about the timout issues. Maybe the next time.
Final thoughts
- I hate WD for their custom stuff. No not really. I understand it makes the HDD much smaller, but it tends to make it harder to recover. Recovering from a USB drive is not nice. PC-3000 and other Hardware Imager normally suspect a SATA Port and the PCB has to be swapped for a SATA Port. (Source: https://blog.acelaboratory.com/if-you-are-planning-to-work-usb-external-hard-drives.html)
- If you ever run into firmware or light mechanical problems on the PCB, it can be fixed. Fixing platter damage or doing an actuator swap is much more difficult. It can be achieved, but should only be attempted if you have a backup of your data anyway.
- Ask around, browse through forums. Forensic guys share a lot of information, what they do and how they do it. It is no magical work, just simple reasoning and deduction. (and a lot of knowledge about what can be swapped and how)
- Fixing mechanical problems is easy, at least most of the time, imaging correct, so the HDD doesn’t die during imaging, is the hard part.
- MAKE BACKUPS
- CHECK YOUR BACKUPS!
- MAKE BACKUPS OF YOUR BACKUPS!
- Never carry around your only backup drive of all of your data.
so long
References
Give Credit were credit is due. There were a lot more links and forum posts and etc. But these are the most important ones.
- Explanation of PCB Swap: https://www.youtube.com/watch?v=LpImzz2pr2s
- Spare PCBs: https://hddpcb.eu/
- Slow Fix:
- compatible USB-SATA Boards:
- More Information on USB Drives: https://blog.acelaboratory.com/if-you-are-planning-to-work-usb-external-hard-drives.html